
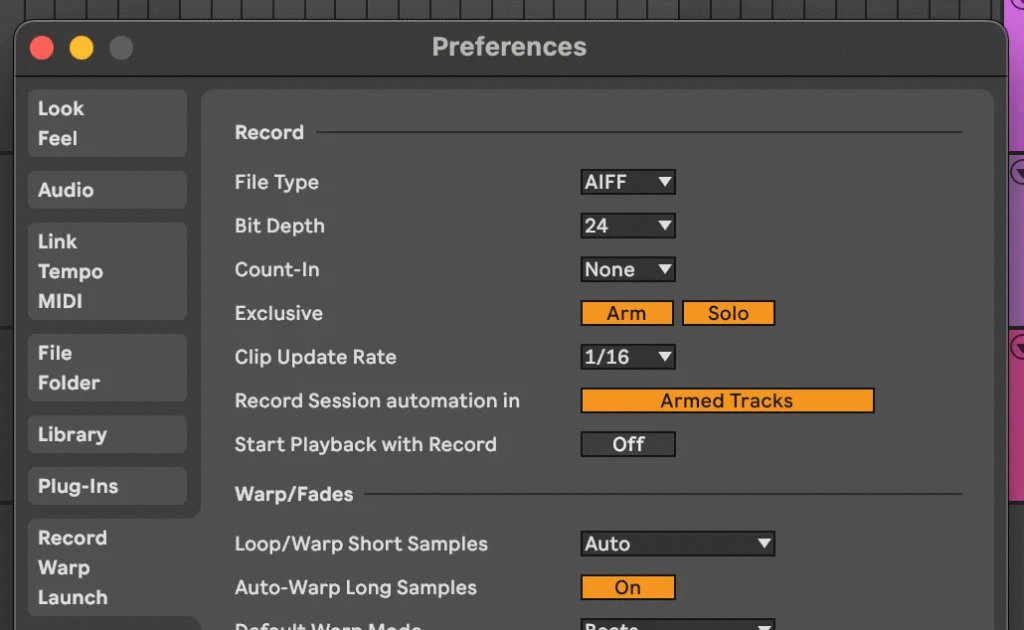
Ableton 11’s record warp and launch preferences will help you define how Ableton starts recording and playback, and controls automatic portions of the warp function. Lets dig into Ableton 11 Preferences: Record Warp and Launch
Ableton 11 Manual – Record Warp Launch
Record
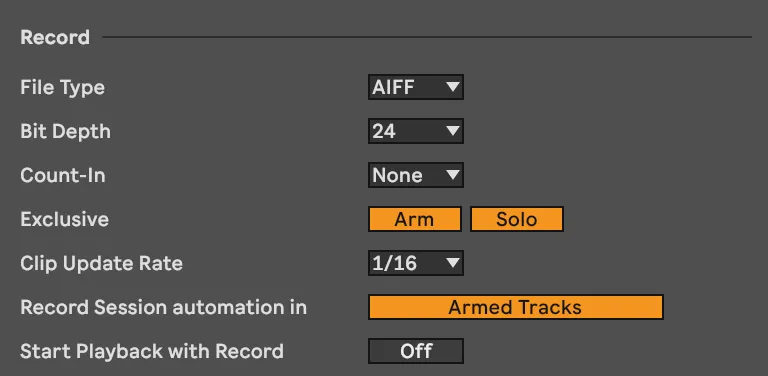
File Type
This is the type of file that a sample saved in Ableton will be saved as. AIFF and WAV are comparable lossless formats, with AIFF being native to the Apple ecosystem and WAV arguably being universally accepted on most if not all systems.
Bit Depth
Bit depth is tied to sample rate in that sample rate describes the individual snapshots of a sound over time, and bit depth is the accuracy and clarity of that snapshot. Think of sample rate like camera frames per second, and bit depth like the camera’s megapixels – more of each means a clearer, more detailed recording.
For example, if I record a note for 1 second with a 44.1k sample rate, that one second recording will consist of 44,100 snapshots of data with each snapshot of data being allotted 16 binary digits to describe that sound. More bits generally equals a wider dynamic range and precise amplitude. A higher bit depth also reduces quantization noise. All this is fancy talk for ‘higher bit depth is better’
Count-In
When count-in is active, Ableton’s metronome will play for 1, 2, or 4 bars before recording begins.
Exclusive
Arming a track prepares it for recording by activating input monitoring and enabling audio/MIDI input. Soloing a track isolates it by muting all other tracks, allowing you to focus on a specific sound or instrument.
Exclusive arming will unarm any other armed track when a track is armed
Exclusive soloing will only allow one track to be soloed at one time.
Both of these features can be overridden by holding command / control while clicking arm or solo.
Clip Update Rate
Clip Update Rate in Ableton is how often the software refreshes and updates clip information while it’s playing.
Record Session Automation In
When you are recording in Ableton, you still have control over Ableton’s UI and you can modify parameters. Record Session Automation defines which tracks will have their parameter changes recorded as an automation. When set to Armed Tracks – any tracks that are armed will have their parameter changes recorded as automations. Changing parameters on unarmed tracks will not record an automation. When set to All Tracks, all tracks will have their parameter changes recorded as automations
Start Playback With Record
When this setting is enabled, playback will begin when you press the record button. When it is off, playback begins when you press play or the session clips are launched. This means that when you are going to record, the system will wait for you to press play before starting the track and recording your changes.
Warp / Fades
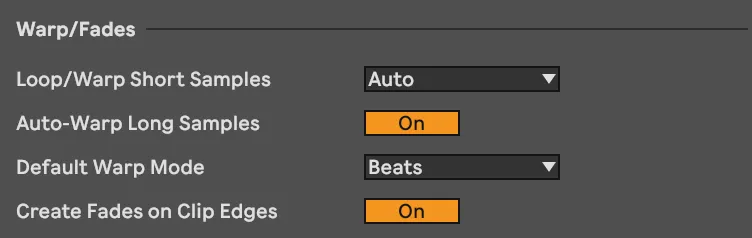
Warping in Ableton is the ability to adjust the timing and tempo of a piece of audio without changing its pitch. Imagine if you had a session drummer that fell behind the beat for a measure. You could use the warp feature to try and align the individual hits with your music track. Alternatively you could stretch a piece of atmosphere so that it covered the bars that you wanted to cover, without altering the pitch.
Loop / Warp Short Samples
This setting instructs Ableton to handle warping of very short samples in a specific way. In this case a very short sample is generally a second or less – like a one shot drum hit.
Auto lets Ableton decide how to handle the sound.
Unwarped One Shot instructs Ableton to not apply warping.
Warped One Shot instructs Ableton to apply warping so that the sound is stretched or compressed to follow the tempo of your track.
Warped Loop is an interesting setting. Selecting this setting will warp a sample to match the tempo, and loop it indefinitely in a seamless loop.
Auto-Warp Long Samples
When this is enabled, Ableton will analyze samples as they are added and automatically warp them to match your songs tempo. Note that the analyzing portion of this process will make your sample unselectable until the analysis is complete.
Default Warp Mode
Ableton has four warp modes. Your selection here will impact the way Ableton automatically warps your sound.
Beats: Best for rhythmic content, preserves transients, ideal for drums Tones: Good for melodic/harmonic sounds, maintains pitch characteristics Texture: Designed for complex audio, preserves sound character Re-Pitch: Changes tempo and pitch together, mimics classic sampling Complex: Advanced time-stretching for mixed audio content
Create Fades on Clip Edges
Cross Fade Clip Edges in Ableton Live smooths transitions between audio clips by adding a short fade at the beginning and end of clips. This technique reduces clicks, pops, and abrupt sound changes.
Launch
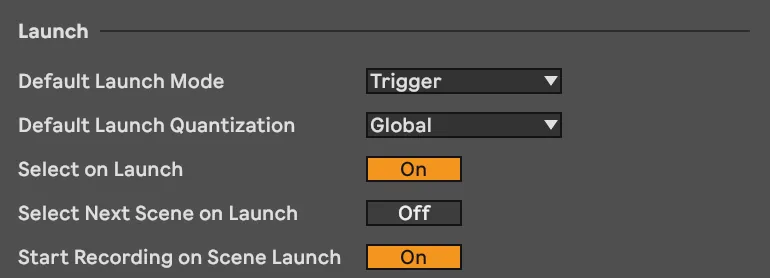
Default Launch Mode
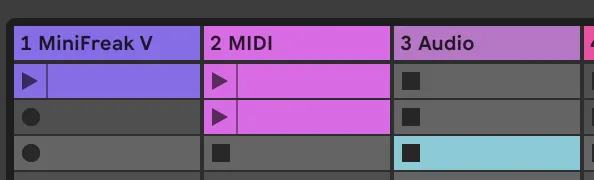
Launching a clip refers to the way individual clips are launched in the session mode. For example, pressing play on a clip will have different actions depending on your launch mode setting. In the image below a clip could be launched by pressing the play icon.
Trigger: Plays clip immediately from the beginning each time it’s launched, restarting the clip from its start.
Gate: Plays the clip only while the button is held down, stopping when the button is released, allowing momentary playback.
Toggle: Starts the clip when first pressed and stops it when pressed again, providing a simple on/off playback control.
Repeat: Continuously repeats the clip in sync with the project tempo, creating ongoing rhythmic patterns.
Fade: Gradually fades the clip in or out, enabling smooth transitions between clips with more subtle audio changes.
Default Launch Quantization
The default launch quantization defines when a clip will launch in relation to the settings on the grid. For example, if my setting is set ti 1/2 note, my clip will start when the play head reaches the half note.
1/4 note (most common): Clip starts on the next quarter note beat
1/2 note: Clip starts on the next half note
1/8 note: Clip starts on the next eighth note
1 bar: Clip starts on the next full bar
No Quantize: Clip starts immediately when triggered
Select on Launch
When this setting is enabled, launching a clip or a scene will select that clip or scene. When this is disabled your currently selected clip or scene will remain unchanged.
In the image below, the columns hold clips and the row is considered a scene. Clips can be played individually or by pressing play on the scene on the right side of the row under the Master column.

Select Next Scene on Launch
When this setting is enabled, the next scene will automatically be selected when you press play. This allows you to trigger the next scene quickly without having to select it.
Start Recording on Scene Launch
When this preference is set to on, launching a scene will automatically begin recording.
Tap Tempo

Start Playback with Tap Tempo
When this is enabled, playback will begin after you have tapped a full measure of the tempo. If disabled, tapping the tempo will set the tempo, but not start playback
MIDI Note Drawing

Draw Mode with Pitch Lock
When drawing midi notes there are two modes. Freehand with no restrictions, and pitch locked drawing. When drawing in freehand mode, midi notes will be drawn wherever you move the mouse. When pitch lock is enabled, MIDI notes will be restricted to the same pitch.
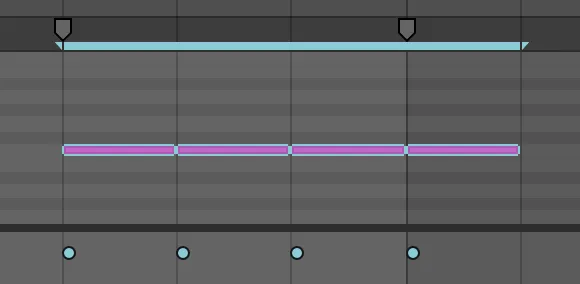
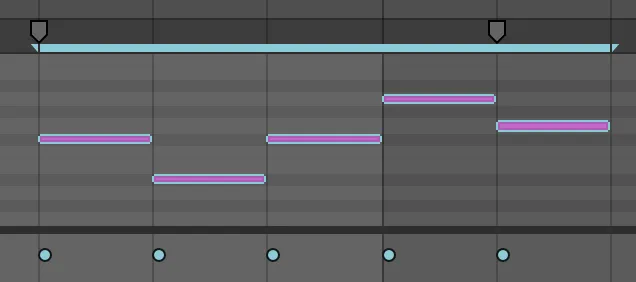
Below on the left pitch lock is enabled. When I draw I am restricted to a single pitch. On the right picth lock is disabled and I can draw freely.
Final Thoughts
These Ableton 11 settings might seem technical, but if you slow down and tackle each individually they are not too difficult. It’s not about knowing every single detail, but about knowing just enough to make your music creation smoother and more intuitive. Experiment, play around, and find what works best for your specific production style.
Coming Up Next: License and Maintenance
Comments
3 responses to “Ableton 11 Preferences: Record Warp and Launch”
[…] Record / Warp / Launch […]
[…] Record / Warp / Launch […]
[…] Coming Up Next: The interesting world of Record Warp and Launch […]