This area of Ableton’s settings allows you to set preferences related to how devices control, and are controlled by Ableton. This section is especially important to understand if you plan on using external devices and instruments.
Ableton 11 Manual – Link Tempo MIDI
What is MIDI
Before beginning this section, let’s define what Musical Instrument Digital Interface (MIDI) is.
Imagine you are in a studio. In front of you is an electronic keyboard that produces piano sounds. When you press a key on the keyboard, a signal is sent to the keyboard’s computer that tells it to emit a sound from the keyboard’s speaker. Press a key, hear a sound from the keyboard.
Across the room there is a second device. It is a computer attached to a speaker. The device has no keyboard attached to it. There is no built-in way to send a signal to the device’s computer to tell it to make a sound. Alone, the device is not capable of making sound.
MIDI is a signal specification that can be used to send instructions between two devices. It strictly defines a data format that two devices can use to transmit, receive, and act on signals in various ways.
Assuming that both the keyboard and the sound-generating device support MIDI, I can send a signal from the keyboard to the sound generator and instruct it to emit a tone from its speaker. In fact, I could send signals to more than one sound generator to produce several sounds simultaneously.
One important thing to keep in mind is that MIDI is only data. It does not inherently make a sound. It is just information that a compatible device can use to take precise actions.
Taking this one step further for the sake of a more well-rounded general definition, a MIDI signal can be classified as a ‘note’ or a ‘parameter’.
MIDI notes define a musical note. The data in a MIDI note signal contains values that specify how ‘hard’ the note was hit, the key, and the duration.
MIDI parameters are general information about other things that can be controlled. For example: volume, panning, intensity.
Adding this to our example, we could say that the keyboard sends a MIDI signal to the sound generator informing it to play a hard C#, panned to the left.
Link

Link allows you to synchronize devices across different hardware. So you would be linking to another computer. This could be used if you were playing live or needed to send information to another instrument on a different computer.
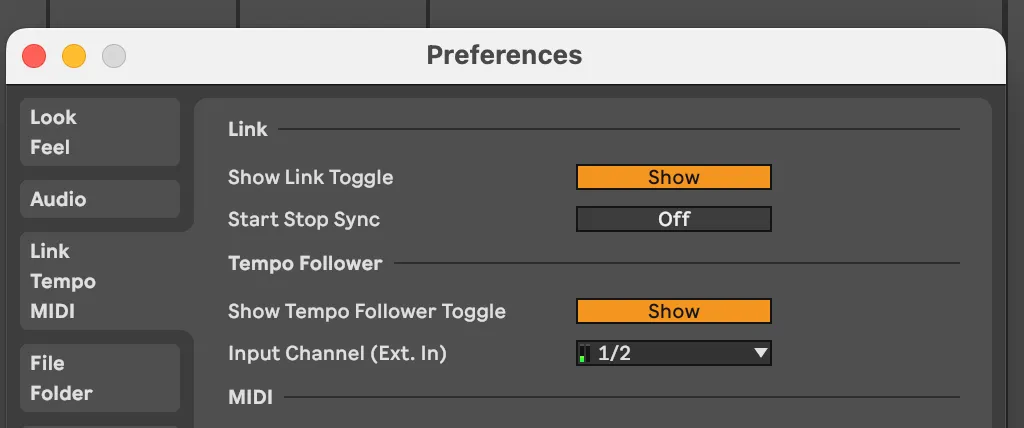
Show Link Toggle
Ableton allows you to control whether or not it is included in a multi-device link. This can be controlled by a button on the main UI. The show link toggle allows you to show or hide this button.
Start Stop Sync
When this is enabled, a Start or Stop signal will be sent to all devices that are connected to this instance of Ableton. Essentially when you press start – all connected devices will start. When you press stop – all connected devices will stop.
Tempo Follower

Show Tempo Follower Toggle
Ableton’s tempo is generally set by the track, but it is possible for Ableton’s tempo to be set or adjusted by an external device. When the Tempo Follower Toggle is set to Show, a Follow button will appear in the upper left corner of Ableton’s user interface. Conversely, if this option is set to Hide, the button will be hidden.
When active, Tempo Follower will allow Ableton’s tempo to be set by the device that is connected on the input channel .
Input Channel (Ext. In)
This is the device that will be used to set Ableton’s tempo when tempo follower is active.
Midi
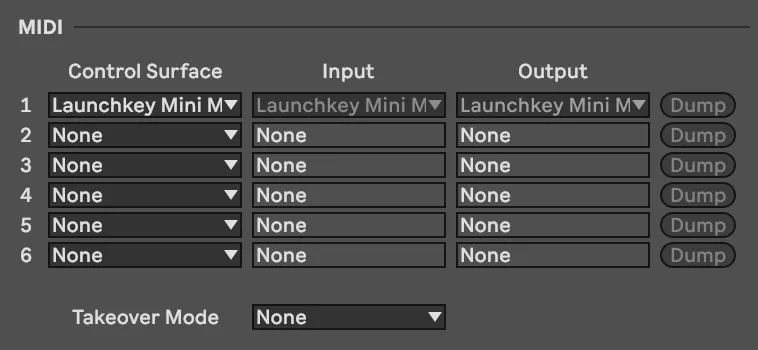
Control Surface
A control surface is a connected device that can be used to control various elements of Ableton’s UI. For example, turning a rotary control on your control surface could turn one of the control knobs within Ableton.
Input
Input specifies the input on your control surface. By naming a device as an input, you are letting Ableton know that signals will be passed into Ableton through this device. Pressing a key on a MIDI keyboard for example.
Output
Output specifies an output that Ableton can send MIDI signals to. An example here would be sending MIDI notes to an external synthesizer outside of Ableton.
Takeover Mode
Before talking about Takeover Mode, it’s good to reflect on our MIDI definition, specifically a MIDI parameter. Recall that the parameter is the part of a MIDI signal that sends general information to devices. Keep in mind that a parameter will be used to set the volume of a device.
Takeover Mode refers to how Ableton reacts when a MIDI parameter is passed to different devices or controls. Specifically, how the device will react when there is a difference between the device’s setting and the MIDI parameter being passed to it. Let’s say a device’s volume is set to 10%. If you send a MIDI parameter to the device, you could raise that device’s volume to 20%.
Takeover mode defines how the device reacts to the change – specifically, how the individual part of the device being controlled by MIDI reacts when its value is ‘taken over’ by the MIDI instruction carried in the parameter signal.
Ableton 11 has two takeover modes: pickup and value scaling.
Pickup mode requires the controller – the device sending the signal – to have an equal value on the control as the controlled device before any changes occur.
This means that if the volume in Ableton is set to 25%, the control surface sending the MIDI signal will need to have its volume slider set to 25% – matching the Ableton device – before any additional changes can occur.
The Value Scaling takeover mode does not require the control surface sending the MIDI signal to match the Ableton device before changing, but it still offers some protection against immediate change by calculating a smooth transition between the old value and the new value.
If the Ableton device has a volume set to 25% and a volume of 50% is sent to it in a MIDI parameter, Ableton will calculate a smooth scale between 25 and 50 and adjust incrementally.
Why is takeover mode important? Imagine if your control surface had a volume set to 100%. Without a takeover mode, the volume on the device being controlled would immediately jump to 100% as soon as the signal was sent.
Final Thoughts
Thats it for Link, Tempo, and MIDI. These settings are mostly important if you have a control surface or musical devices that you want to use with Ableton. If you do not have either of these things yet, you may only want to clean up your interface by hiding the follower and link buttons.
Coming Up Next: File and Folder.
Comments
One response to “Ableton 11 Preferences: Link Tempo and MIDI”
[…] Link / Tempo / MIDI […]